Schedule Out Of Office
Kapost’s Out-of-Office (OOO) Management feature brings greater clarity and coordination to your content operations by making your team's availability visible and easily accessible. With OOO management integrated directly into the platform, team members can set and share their time off, ensuring everyone knows who is available for tasks, approvals, or project work. The OOO status is displayed across calendars, user avatars, and Studio workflows, allowing for smooth project planning and execution. No more guessing who is around to take on the next task—Kapost helps you plan smarter and collaborate more effectively, all within the platform.
How It Helps
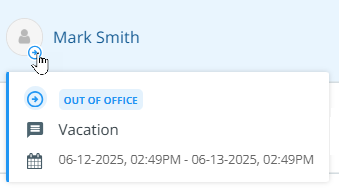
The Out-of-Office feature improves team coordination and reduces miscommunication by clearly marking a user's unavailability. When a user schedules time off, an OOO icon appears on their avatar across all Kapost apps, including calendars, Studio user drop-downs, and workflows. Teammates can instantly see when someone is unavailable, ensuring that work is not assigned to the wrong person. The feature also allows users to add a custom message explaining the reason for their absence, providing context for their time off. The OOO status remains visible until the scheduled end date, ensuring continuous awareness throughout the absence.
Additionally, users are listed under their respective group titles in the drop-down, along with their upcoming OOO events, making it easier to understand team structures and plan effectively. Any changes to OOO events such as scheduling or rescheduling are logged in the Member Activity log, offering full transparency into who made the updates and what changes were made to the event dates.
Scheduling Out-of-Office
To schedule your OOO:
-
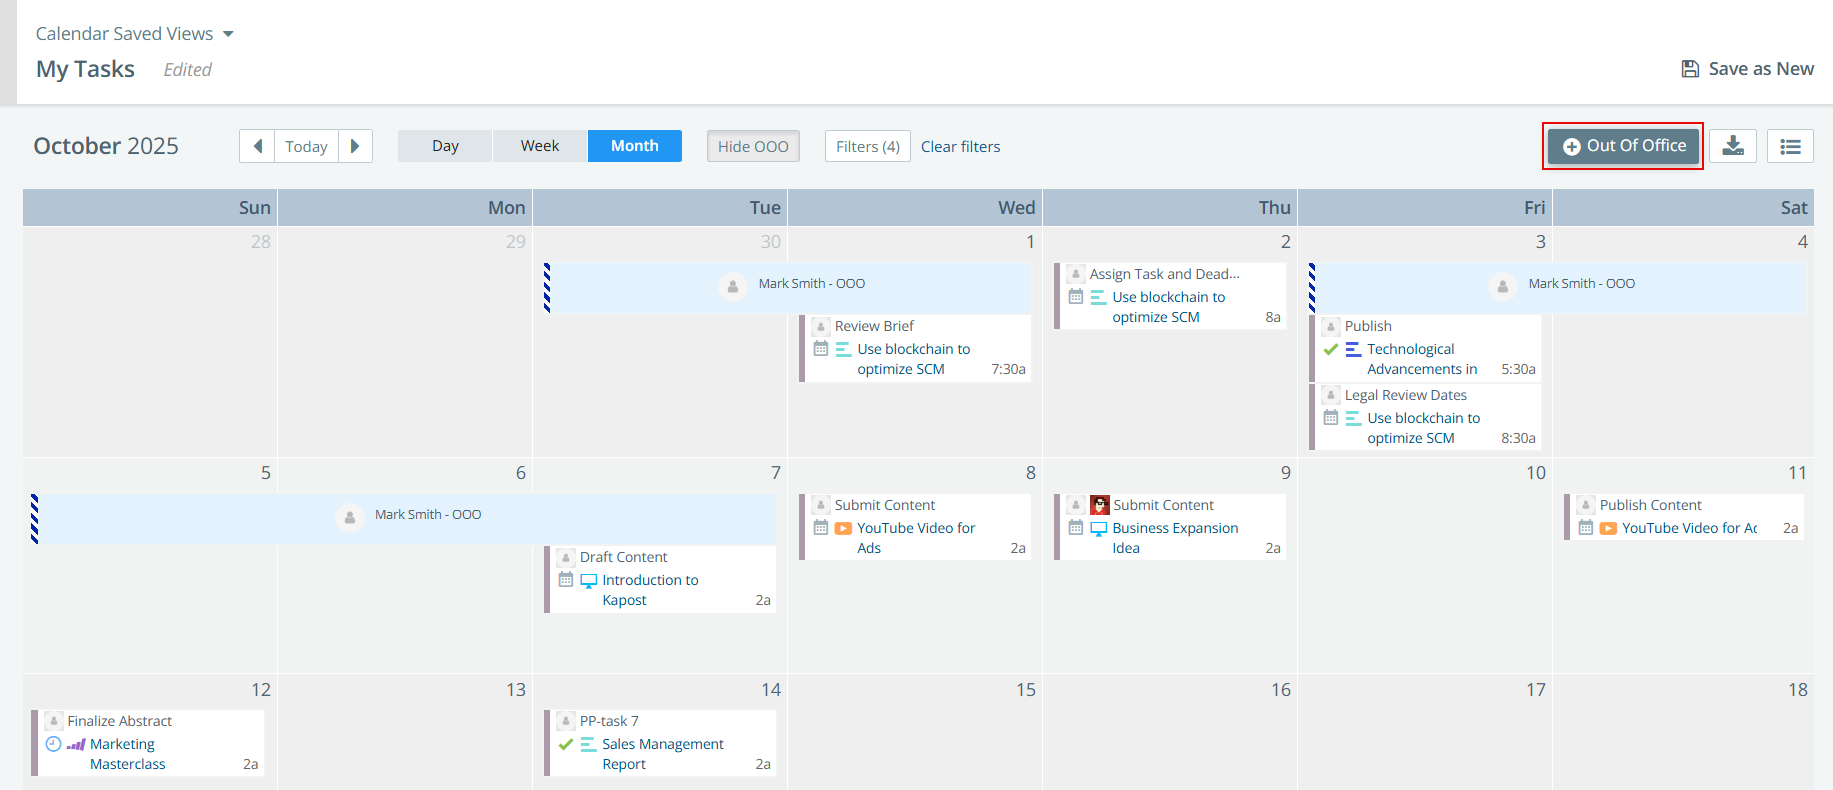
From the Home page, click the Calendar icon
 in the left navigation panel.
 -
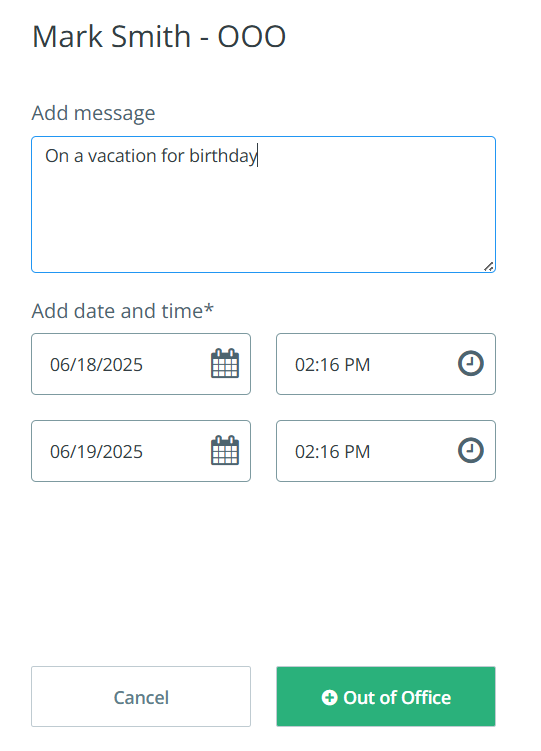
Click + Out Of Office to open the scheduling panel. The OOO title is automatically generated based on the user’s profile name.
-
In the Add Message field, enter a description or context for your time off.
-
Select your Start Date and Time and End Date and Time.
-
Click + Out of Office to save the event.
Viewing Out-of-Office Events
To view OOO events in the calendar:
-
Click the Show OOO button to display all OOO events.

Clicking the Show OOO button displays a bar in the calendar representing the scheduled OOO event, spanning from the start date to the end date. Hovering over the bar shows the message and OOO dates provided by the user when the event was scheduled.
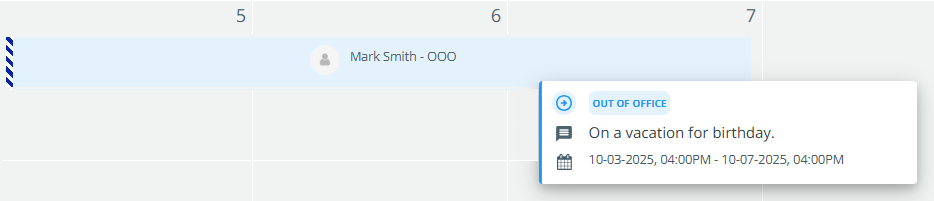
An Out of Office (OOO) icon will also automatically appear on the user's avatar in the calendar and across Studio for the duration of their absence.
-
Click Hide OOO to hide Out-of-Office events from your calendar.

Tip: You can save calendar views that include OOO events and other filters for future use.
Rescheduling an Out-of-Office Event
To modify an existing OOO event:
-
Click the Show OOO button to display all OOO events.
-
In the Calendar view, click on your OOO event.
-
The Reschedule OOO panel opens.
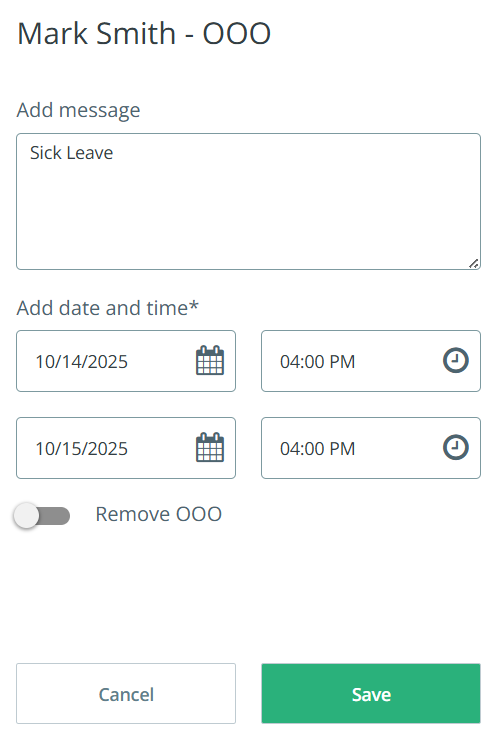
-
Update your message and start/end time details.
-
Click Save to apply changes.
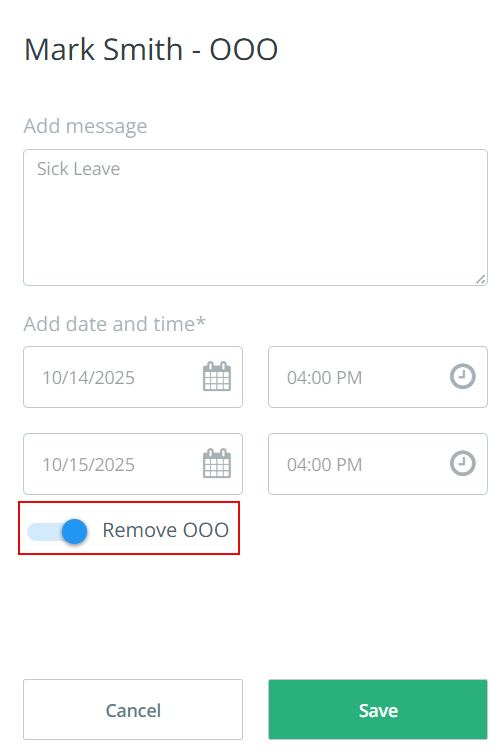
Removing an Out-of-Office Event
To remove your scheduled OOO event:
-
Click the Show OOO button to display all OOO events.
-
In the Calendar view, click on your OOO event.
-
In the Reschedule OOO panel, turn on the Remove OOO toggle button.
-
Click Save to remove the event.
Note:
-
Events scheduled or updated from any instance will apply to all instances the user is part of.
-
OOO events will not appear on publicly shared calendars, regardless of whether they are part of a saved view. However, they will be visible on privately shared calendars if they are included in the saved view.
-
OOO events are not included in exports by default, even if they are a part of saved view. However, they can be exported separately. To learn more, refer to Export Out Of Office Events.
-
OOO events are not visible in the Day and Week views of the calendar.